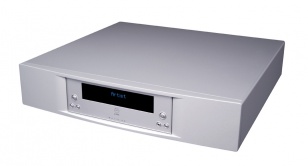
Majik DS (Exakt Variant)
Contents
Product info
- Product Name: Majik DS /2 (2015 Variant)
- Other variants of this product can be found at Majik DS Variants
- Other variants of this product can be found at Majik DS Variants
- Date of Introduction:April 2015 - Sept 2018
- Upgraded to Majik DS/2 with Exakt-link functionality
- Type: Digital music player with Exakt capability
- Features
Support
Latest software
Details of latest Product release software
Manuals
Network Setup
Back Panel Connections
- MAINS INPUT - To connect to the mains electricity supply.
- EARTH GROUND - To connect to an earthing terminal if no mains earth is available or to join to the earths of other products in the system to improve perfromance in areas of poor/noisy electrical earth conditions.
- RS232 PORTS - To connect to other Linn devices that don't have ethernet.
- ETHERNET - To connect to a network (100Base-T)
- FALLBACK - To put the device into Fallback mode (used when reprogramming)
- EXAKT LINK- For connection of Exakt products (Exakt speakers/ExaktBox).
- SPDIF OUT - To connect to an external DAC or computer that has an Spdif input.
- TOSLINK OUT - To connect to an external DAC or computer that has a TOSLINK input.
- ANALOGUE AUDIO OUTPUTS - To connect to a preamplifier (or power amplifier when internal volume control is enabled) with unbalanced (RCA) analogue inputs.
Front Panel Connections
- DISP BUTTON - Changes the front panel display mode.
- SKIP BUTTONS - Skips to the previous/next track
- STOP BUTTON - Stops playing the current track
- PLAY BUTTON - Starts playing the current track
- POWER SWITCH- To switch the power on/off.
- STANDBY BUTTON - Brings the product in/out of standby.
- FRONT PANEL DISPLAY
Installation
Please read the following carefully before installing the unit in your system – your unit may need to be reconfigured by your Linn retailer.
FAQ's
Check:
For further assistance, try our customer support pages


