Difference between revisions of "360 pwab /Setup"
m (→Externally Aktiv additional connections) |
m (→Externally Aktiv additional connections) |
||
| Line 95: | Line 95: | ||
<br><br><br><br><br> | <br><br><br><br><br> | ||
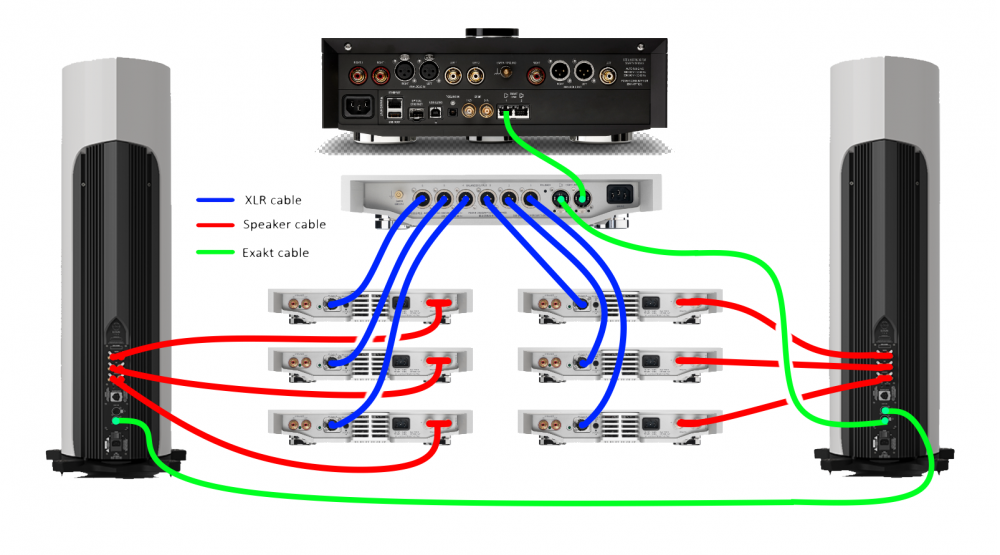
| − | :Externally Aktiv sample wiring using a Klimax DSM, a Klimax Exaktbox, | + | :Externally Aktiv sample wiring using a Klimax DSM, a Klimax Exaktbox, six Klimax Solos amplifiers and a pair of 360 PWAB loudspeakers |
:;<font style="color:red">Note how the Exakt wiring goes to all Exakt products including the 360 loudspeakers</font> | :;<font style="color:red">Note how the Exakt wiring goes to all Exakt products including the 360 loudspeakers</font> | ||
[[File:360_pwab_Extrenally_Aktiv_wiring.png|1000px|centre|link=]] | [[File:360_pwab_Extrenally_Aktiv_wiring.png|1000px|centre|link=]] | ||
Revision as of 08:51, 27 April 2023
Contents
Manuals
Installation
We recommend that your 360 loudspeakers are unpacked, installed and adjusted by an authorised Linn retailer. To get the best from your 360 loudspeakers, it is important that they are positioned and levelled correctly.
Please note, in order to achieve the very best from your 360's, some adjustment may be required after positioning, levelling and connecting. See the Fine adjustment section.
Unpacking
IMPORTANT:
The 360 speakers are heavy; take great care when moving them.
When unpacking, lifting or moving them, we recommend using two people to avoid personal injury.
- Do not lift your speaker using the amplifier module, this will cause damage to your loudspeaker.
- Do not lay the loudspeakers on their front face or the amplifier on the rear as this will damage the loudspeaker.
- Do not lay the loudspeakers, in any orientation, without the transit bolts in place as this would risk damage to both the cabinet and the module isolation mounts.
- We recommend that you retain the packaging in case you need to transport your loudspeaker(s) at a later date.
- Loudspeakers are packed individually with a separate package containing both speaker stands.
- Take care when unpacking to avoid damage to the cabinets.
- A video of how to unpack and fit stands can be found below
-
-
Positioning
As with any stereo loudspeaker, there are some fundamental principles which should be observed to get the best sound from your loudspeakers.
- The loudspeakers should be place at an equal distance from the wall behind the loudspeakers.
- The speakers should be a similar (not the same) distance from the walls to the outside of each loudspeaker.
- Any toe-in applied should be the same for each loudspeaker.
- The loudspeakers should be level with all four spikes in contact with the floor. Use Linn Skeets for hard floors.
For further assistance, try our customer support pages.
Levelling
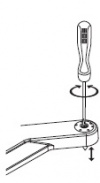
Screw the spikes into the corners of the stand.
Fit the lock nuts, but do not tighten at this stage.
Very carefully (do not scratch the cabinet), use a spirit level to check if it is sitting
level. If it is, gently rock the loudspeaker from front to back, side to side and
diagonally to check for any movement. If none is present and the loudspeaker is
sitting level, no adjustment to the spikes is necessary.
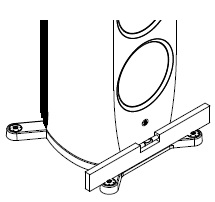
If the loudspeaker is not level, or moves when you rock it, loosen the appropriate lock nuts using the tool provided and use a screwdriver to turn the spikes to adjust their height. Adjust the spikes to level the speaker, using a spirit level placed on the stand.
Press down firmly on the top of the loudspeaker to ensure it is in close contact with the flooring.
Use the spirit level as before and continue to adjust the spikes as required.
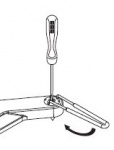
Once the speaker is level and does not rock, use the screwdriver to hold the spike in place and fit and tighten the lock nuts with the spanner provided.
Note: To protect wooden or tiled floors, the spikes can be placed on Linn Skeets, which are available from your Linn retailer.
Connections & operation
Back Panel

- MAINS INPUT - To connect to the mains electricity supply.
- POWER SWITCH - To connect sources with phono outputs.
- BALANCED INPUT'(XLR-Line level)
- GAIN 1 - Adjust the Bass gain to match the external amplfiers used.
- FEED 2 - To define if Bass amplifier feed from XLR or speaker terminals
- UPPER BASS - 4mm terminals for upper Bass drive unit.
- MID - 4mm terminals for mid-range drive unit.
- TWEETER - 4mm terminals for treble drive unit
- Removable plate - Exakt sockets ONLY for use with externally Aktiv configuration with ExaktBox(s)
Notes:
- 1: ONLY for XLR Feed 2 Power DAC gain to match the level of the bass system with your choice of power amplifier. Linn power amplifiers have a gain of 27 dB, 0 GAIN.
- 2 To select the Power DAC feed:
- ‘INT’ – Input feed from the speaker terminals. (If you don’t have a suitable line-level output).
- ‘XLR’ – Input feed from the line-level XLR input. (Best sound quality option).
- When using XLR you should ensure the bass amplifier gain is matched to your power amplifiers, 1
- Passive Example

Externally Aktiv additional connections
- Remove plate, #9 above, to show the Exakt connections.
- After being converted into an external aktiv setup, by an experienced Linn Retailer, the 360 loudspeaker MUST connected to the Exakt-link circuit for setup and operation.
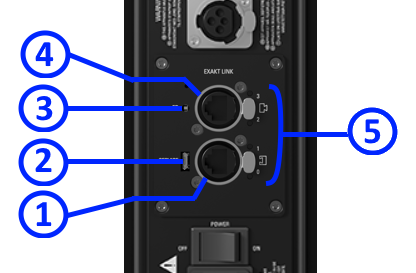
- EXAKT LINK - From Exakt Master OR from a Exakt Slave connected to the Exakt master
- SERVICE - For use of Linn Technicians only
- FALLBACK - Primarily for Linn service use only, to put the device into Fallback mode (used when reprogramming the unit).
Note: The LED behind the Fallback indicates the Exakt Link is active but the product is not powered/switched off. - EXAKT LINK - To Exakt Slave product
- STATUS INDICATORS - Function of the LED's are given below:
- Externally Aktiv sample wiring using a Klimax DSM, a Klimax Exaktbox, six Klimax Solos amplifiers and a pair of 360 PWAB loudspeakers
- Note how the Exakt wiring goes to all Exakt products including the 360 loudspeakers
EXAKT LINK connection
Check HERE for information of Exakt link connection
LED Status
- Front panel
|
LED |
OFF |
ON |
Flash / Blink |
'RED' |
| Diffuser light (between cabinet and stand) | No power | Ready to Rock n Roll | Starting up or Fallback mode | Amplifier fault |
- Back panel
|
LED |
OFF |
ON |
Flash / Blink |
| 0 Master Port | No Link | Link Discovered | Link Activity |
| 1 Audio Clock | No Clock | Clock locked | Clock not locked |
| 2 Slave Port | No Link | Link Enabled | Link Activity |
| 3 Software Status | Not Configured | Running | Hardware Fault |