Kazoo Server setup Manual
Contents
- 1 Kazoo Server for Mac, Windows and QNAP
Kazoo Server for Mac, Windows and QNAP
Introduction
Kazoo Server provides the ability to browse and playback music on a Linn DS or UPnP media renderer. Kazoo Server allows a UPnP control point, such as Kazoo, to:
- . Browse music in folders on a local machine or on a mapped network share
- . Browse an iTunes installation
- . Listen to online content
- . Save and Share playlists
Supported formats include MP3, FLAC, MP4, AIFF, Ogg FLAC, & Ogg Vorbis. Note:
- The Kazoo Server does not support WAV files due to poor tagging.
- Untagged files are not listed in the Kazoo Server tree
Version History
Check HERE for details of Kazoo Server versions.
Installation
System Requirements
Mac
- Mac OS X Lion 10.7 up to 10.14 Mojave
- 32 or 64-bit hardware
Windows
- Windows XP/Vista/7/8/10/Home Server 2011
- 32 or 64-bit hardware
QNAP
- Intel-x86 64bit based CPU up to QTS 4.3 DOES NOT WORK WITH QTS 4.4.1 onwards
- (For QTS 4.4.1 try Kazoo Server Beta 4.10.1 QNAP x86 downloadable from >HERE< )
- Due to QNAP End-Of-Life support these QNAP NAS only have firmware up to QTS 4.26.
- This version of firmware is no longer supported by Kazoo Server.
- The latest version of Kazoo Server available for QTS 4.26 and earlier is V4.8.5 QNAP x86 (32bit)
- For example
- TS-239 Pro, TS-239 Pro II, TS-239 Pro II+, TS-259 Pro, TS-259 Pro+, TS-439 Pro II,
- TS-459 Pro, TS-459U-RP+/SP+, TS-439 Pro II+, TS-459 Pro II, TS-459 Pro+, TS-459U-RP/SP, SS-439-Pro
- QNAP Models may change and this information was correct at the time of writing
- For example
- Intel-x86 64bit based CPU
- Recommend at least 4GB of RAM installed on these QNAP NAS
- For example
- TS-x51 Series, TS-x51+ Series, TS-x51A Series, TS-x53B Series, TS-x53A Series, TS-x53U Series
- TS-251, TS-253A, TS-259 Pro, TS-269L, Pro II, TS-451, TS-459 Pro II, TS-469L, TS-651, TS-851
- QNAP Models may change and this information was correct at the time of writing
- For example
- ARM x19 based CPU support
- For example
- TS-119P II,TS-119P +,TS-119, TS-219P, TS-219, TS-219P II, TS-219P+, TS-221, TS-419U II, TS-419P, TS-419U II, TS-439U-RP/SP
- TS-419P II, TS-419P+, TS-419U+, TS-419U,SS-439-Pro
- QNAP Models may change and this information was correct at the time of writing
- ARM x31/x41 based CPU support
- For example
- TS-131, TS-231 ,TS-231+, TS-431, TS-431+
- Note TS-231P2 & TS-431P uses an Alpine CPU that is not supported at this time.
- QNAP Models may change and this information was correct at the time of writing
- ARM x41 based CPU support
- For example
- TS-128, TS-131P, TS-231P
- Note TS-128A/228A uses a different CPU that is not supported at this time
- QNAP Models may change and this information was correct at the time of writing
Installing
Mac
- 1. Download the .dmg file from the download page
- 2. Double click the downloaded .dmg file
- 3. Double click the !InstallerKazooServer.pkg file contained within the window which pops up with the dmg contents
- In OSX CATALINA you will need to give authorisation to install. To do this go into System Preferences > Security & Privacy" and allow thi sApp to install.
- 4.Follow the on screen instructions in the installer program
Windows
- Download the installer from the download page
- Double click the downloaded .exe file
- Follow the on screen instructions in the installer program
QNAP
- Download the Kazoo Server .qpkg file from the download page
Check the QTS firmware version on the QNAP, if this is 4.26 or earlier on a x86 processor NAS
you will need to download the QNAP x86 (32bit) version - Login to the QNAP web interface
- Click the "Control Panel" icon
- Select "Privilege Settings" --> "Users" and click the "Home Folder" button
- Select the "Enable home folder for all users" tick box and choose a disk volume in the drop down men
- Click the "App Center" icon
- Click the "All Apps" tab
- For x86 QNAP running QTS 4.2.6 and earlier (such as TS 239), Click and Install the QMONO package from HERE (5.4.1.6 version) or HERE, select Older versions and look from 5.4.1.6.0 for TS-NASX86
- Select Settings and click the "Install Manually" button
- "Browse.." to the location you have downloaded KazooServer .qpkg file
- Click on "Install"
- After the installation completes click the "ON/OFF" button on the KazooServer icon to enable the application.
- Then Reboot the QNAP
- Download the Kazoo Server .qpkg file from the download page
Uninstalling
Mac
- Download the .dmg file from the download page
- Double click the downloaded .dmg file
- Double click the uninstall.tool file and provide your password to the script if prompted
Windows
- Open the Windows Control Panel and double click "Programs and Features"
- Select "KazooServer" in the list of programs and click the "Uninstall" button
- Follow the on screen instructions in the uninstall window
QNAP
- Login to the QNAP web interface
- Click the "App Center" icon
- Hover over the KazooServer icon and click on "More..."
- Click the "Remove" button
Updating
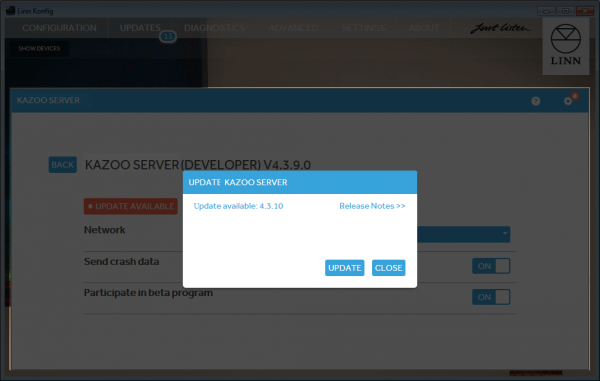
Kazoo Server for Mac and Windows will automatically check for new software updates and notify you via a badge on the preferences button (see below).
If an update is available, a button will appear in the preferences page which will open a dialog providing details on the update. Pressing the update button will cause Kazoo Server to update to the latest stable or beta version (depending on whether you have selected the option to join the beta program in preferences).
Alternatively, Kazoo Server can be updated by manually downloading the installation packages from the Download page and installing them using the method described in the Installing section above.
Running Kazoo Server
After installation, Kazoo Server will run automatically using the user account of the first user who logs in and remain running as that user whilst they remain logged in.
If the user account running Kazoo Server is logged out, Kazoo Server will attempt to find another logged in user and run using the account of that user.
If you wish Kazoo Server to run without intervention on computer restart, you must also configure a user account to log in automatically.
- On Mac, choose Automatic Login user under System Preferences, Users & Groups.
- On Windows, there should be an checkbox entitled "Users must enter a user name and password to use this computer" under Ctrl Panel, User Accounts, Manage User Accounts.
On Windows Home Server and other Windows Server installations, Kazoo Server will run as the local system and does not require a user to be logged in.
Configuring Kazoo Server
After installation of Kazoo Server, one of the following icons will appear in the system tray ![]()
The colour of this icon is an indicator of the current state that Kazoo Server is in. A green icon indicates that Kazoo Server is started and not currently refreshing any of its content. An amber icon indicates that Kazoo Server is started but one or more of its components is currently refreshing. Lastly, a red icon implies that either Kazoo Server itself is stopped or else none of its components are presently enabled. Clicking this system tray icon will bring up a context menu which has two items in it. !Start/Stop Kazoo Server toggles the server between started and stopped states. If the server is started, then clicking Configure Kazoo Server will open a configuration window with the main settings page.
If running on Windows Home Server or QNAP, the system tray icon is not available. You should ensure that you have also downloaded Konfig. When you run Konfig, Kazoo Server will appear in the device list under the configuration tab. Clicking on the Kazoo Server device in Konfig will bring up the main settings page.
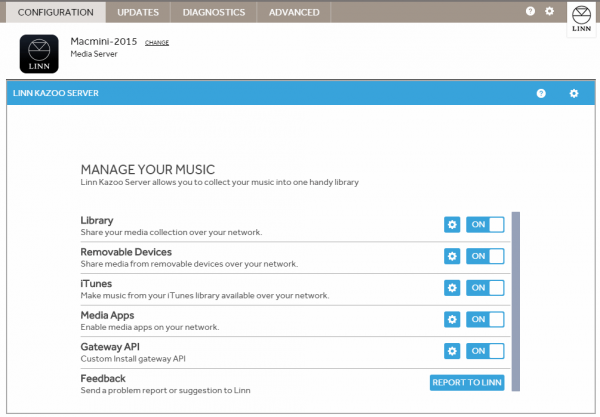
The main settings page consists of 3 sections (detailed below), plus a help button which links to this manual and a preferences button which opens the preferences page.
Each of the 3 main sections Library, iTunes, and Media Apps can be individually enabled or disabled via the On / Off switch next to the section header.
In addition, a ![]() configuration button takes you to a configuration page for each section.
configuration button takes you to a configuration page for each section.
Help
The ![]() help button opens this manual in your default web browser.
help button opens this manual in your default web browser.
Preferences
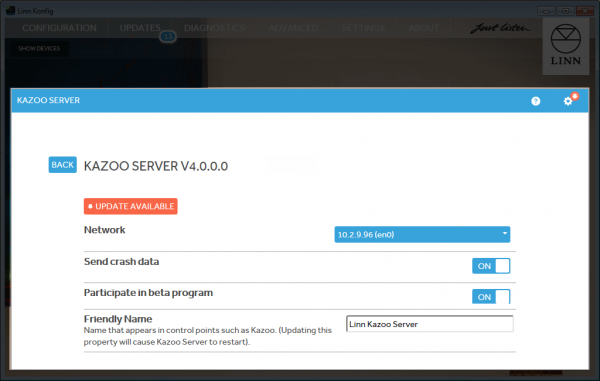
The ![]() preferences button opens the preferences page.
preferences button opens the preferences page.
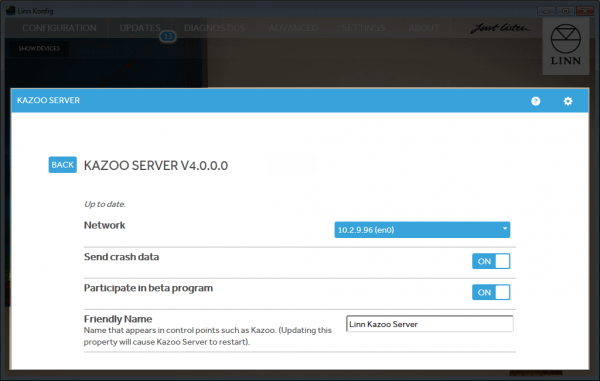
Here, you can choose which network to run Kazoo Server on if you have more than one network, choose whether or not to send crash reports to Linn, choose whether to participate in the beta program and update Kazoo Server when updates become available.
Note: This IP address range is static and will have to be reset if used on a different LAN
Clicking the 'BACK' button will take you back to the main settings page.
Library
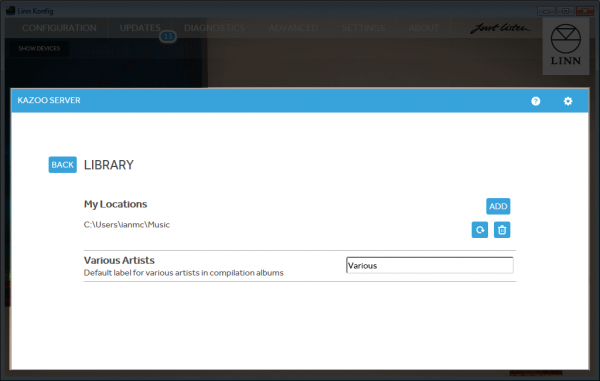
The Library settings page allows you to add or remove folders containing music to be indexed by Kazoo Server and made available to Kazoo for playing on your DS.
Clicking the 'ADD' button brings up a dialog which allows you to select a folder to add. Once Kazoo Server has scanned this folder for music, a delete and refresh button will be available next to this folder in case you wish to remove it again or force a rescan.
Any network drives mapped by the user account Kazoo Server is running under will appear in the drive letters dropdown within this Dialog (on Mac, these will appear as /Volumes/XXX, On the QNAP this will appear as /SHARE/CACHEDEV1_DATA...).
Folders on a local hard drive on your computer should automatically refresh if their contents change, but a refresh button is also provided in case you have selected a mapped network drive which may not notify Kazoo Server when its contents change.
Within the Library settings page, you can also edit the default label used for various artists in compilation albums.
Clicking the 'BACK' button will take you back to the main settings page.
Note: The Kazoo Server does not support WAV files
Removable Devices
This will allow to to select which removable devices (such as USB drives) are visible in the Kazoo Server.
iTunes
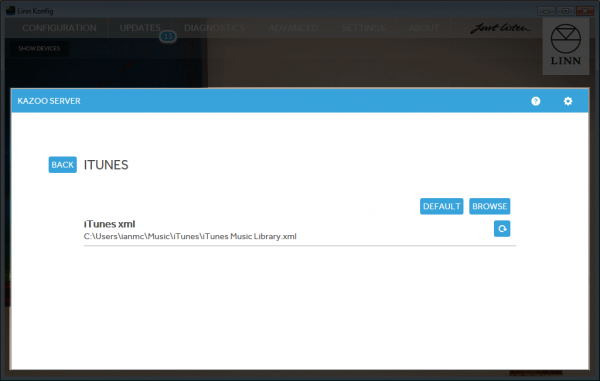
iTunes stores its music collection in a file called "iTunes Music Library.xml", which is stored by default in the Music folder of the logged in user.
If there us no "iTunes Music Library.xml" go into the iTunes Preferences > Advanced and enable the "Share the iTunes Library XML with other applications"'
Clicking the 'BROWSE' button in the iTunes settings page brings up a file chooser which allows you to select a new location if the default location of the iTunes library file is not correct for your setup.
This should automatically refresh if the iTunes music collection changes, but a refresh button is also provided to allow manual refreshing.
The 'DEFAULT' button restores the default iTunes xml file location (<<user home>>/Music/iTunes/iTunes Music Library.xml).
Clicking the 'BACK' button will take you back to the main settings page.
Media Apps
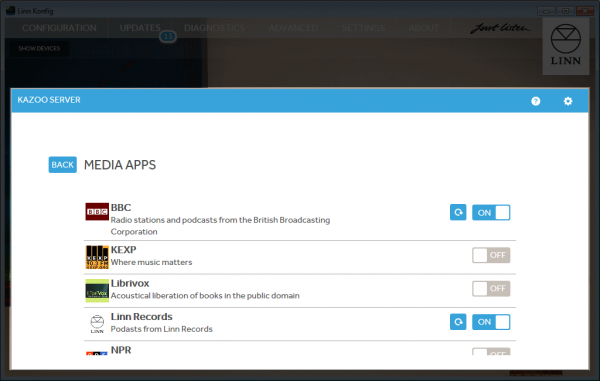
Media apps is an aggregation of common media sources available online. Content from individual providers appears as an item within the list of media apps.
These will refresh periodically but can also be manually refreshed by pressing the refresh button ![]() .
.
Individual apps can be enabled and disabled via the On / Off switch next to that app.
Clicking the 'BACK' button will take you back to the main settings page.
Kazoo Server in Kazoo
Kazoo Server appears as a media server in the Music page of Kazoo.
We advise if Kazoo Server is being used to turn off the iTunes Plugin with Kazoo and use Kazoo Server for this instead.
Gateway API
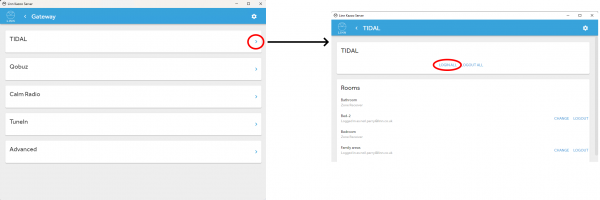
This is an interface to allow control apps, such as the Linn Control 4 module and Linn Crestron module, can control the Linn DS/DSM's and UPnP Media Servers in this network. Streaming service logins and current login status can be configured in the gateway settings UI.
FAQ
How do I rescan the Music?
- If you go into the Configure Kazoo Server > Library you will find a
 button.
 - Pressing this refresh button
 to manually refresh your library contents.
How do I get Multi-Disc albums to show as one album?
Criteria *The important point is double check that the Meta data within each track has thediscnumber.
* All tracks of this multi-disc album should be in to the same folder of your NAS/PC/MAC.
Check the above has been done and finally, go into Kazoo > Library and do a rescan (as above)
.
After this is complete your multi-disc album will now show as one album
Troubleshooting
Check Kazoo Server issues
